VTiger CRM 설치방법 (Ubuntu 20.04, MariaDB)
https://sourceforge.net/projects/vtigercrm/
Vtiger CRM
Download Vtiger CRM for free. An enterprise-class CRM and more! Vtiger CRM enables sales, support, and marketing teams to organize and collaborate to measurably improve customer experiences and business outcomes. Vtiger CRM also includes email, inventory,
sourceforge.net
https://websiteforstudents.com/install-vtiger-crm-on-ubuntu-16-04-lts-with-apache2-mariadb-and-php-7-1-support/
Install vTiger CRM on Ubuntu 16.04 LTS with Apache2, MariaDB and PHP 7.1 Support - Website for Students
When looking for enterprise Customer Relationship Management platform for your business, Vtiger CRM is a good place to start. this open source CRM software is
websiteforstudents.com
Step 1: Install Apache2
Vtiger CRM requires a webserver and the most popular webserver in use today is Apache2. So, go and install Apache2 on Ubuntu by running the commands below:
sudo apt update
sudo apt install apache2
After installing Apache2, run the commands below to disable directory listing.
sudo sed -i "s/Options Indexes FollowSymLinks/Options FollowSymLinks/" /etc/apache2/apache2.conf
Next, run the commands below to stop, start and enable Apache2 service to always start up with the server boots.
sudo systemctl stop apache2.service
sudo systemctl start apache2.service
sudo systemctl enable apache2.service
Step 2: Install MariaDB
Vtiger also requires a database server. and MariaDB database server is a great place to start. To install it run the commands below.
sudo apt-get install mariadb-server mariadb-client
After installing, the commands below can be used to stop, start and enable MariaDB service to always start up when the server boots.
sudo systemctl stop mysql.service
sudo systemctl start mysql.service
sudo systemctl enable mysql.service
After that, run the commands below to secure MariaDB server.
sudo mysql_secure_installation
When prompted, answer the questions below by following the guide.
- Enter current password for root (enter for none): Just press the Enter
- Set root password? [Y/n]: Y
- New password: Enter password
- Re-enter new password: Repeat password
- Remove anonymous users? [Y/n]: Y
- Disallow root login remotely? [Y/n]: Y
- Remove test database and access to it? [Y/n]: Y
- Reload privilege tables now? [Y/n]: Y
Restart MariaDB server
sudo systemctl restart mysql.service
Step 3: Install PHP and Related Modules
PHP 7.1 isn’t available on Ubuntu default repositories… in order to install it, you will have to get it from third-party repositories.
Run the commands below to add the below third party repository to upgrade to PHP 7.1
sudo apt-get install software-properties-common
sudo add-apt-repository ppa:ondrej/php
Then update and upgrade to PHP 7.1
sudo apt update
Run the commands below to install PHP 7.1 and related modules.
sudo apt install php7.1 libapache2-mod-php7.1 php7.1-common php7.1-mbstring php7.1-xmlrpc php7.1-soap php7.1-gd php7.1-xml php7.1-intl php7.1-mysql php7.1-cli php7.1-mcrypt php7.1-ldap php7.1-zip php7.1-curl
After install PHP, run the commands below to open Apache2 PHP default file.
sudo nano /etc/php/7.1/apache2/php.ini
Then make the change the following lines below in the file and save.
file_uploads = On
allow_url_fopen = On
memory_limit = 256M
upload_max_filesize = 64M
max_execution_time = 30
display_errors = Off
max_input_vars = 1500
date.timezone = America/Chicago
Step 4: Create Vtiger Database
Now that you’ve install all the packages that are required, continue below to start configuring the servers. First run the commands below to create Vtiger database.
Run the commands below to logon to the database server. When prompted for a password, type the root password you created above.
sudo mysql -u root -p
Then create a database called vtigercrmdb
CREATE DATABASE vtigercrmdb;
Create a database user called vtigercrmuser with new password
CREATE USER 'vtigercrmuser'@'localhost' IDENTIFIED BY 'new_password_here';
Then grant the user full access to the database.
GRANT ALL ON vtigercrmdb.* TO 'vtigercrmuser'@'localhost' IDENTIFIED BY 'user_password_here' WITH GRANT OPTION;
Finally, save your changes and exit.
FLUSH PRIVILEGES;
EXIT;
Step 5: Download Vtiger Latest Release
Next, visit Vtiger site and download the latest version.
After downloading, run the commands below to extract the download file into Apache2 root directory.
cd /tmp && wget https://sourceforge.net/projects/vtigercrm/files/vtiger%20CRM%207.0.1/Core%20Product/vtigercrm7.0.1.tar.gz
tar xzf vtigercrm7.0.1.tar.gz
sudo mv vtigercrm /var/www/html/vtigercrm
Then run the commands below to set the correct permissions for Concrete5 to function.
sudo chown -R www-data:www-data /var/www/html/vtigercrm/
sudo chmod -R 755 /var/www/html/vtigercrm/
Step 6: Configure Apache2
Finally, configure Apahce2 site configuration file for Vtiger. This file will control how users access Vtiger content. Run the commands below to create a new configuration file called vtigercrm.conf
sudo nano /etc/apache2/sites-available/vtigercrm.conf
Then copy and paste the content below into the file and save it. Replace the highlighted line with your own domain name and directory root location.
<VirtualHost *:80>
     ServerAdmin admin@example.com
     DocumentRoot /var/www/html/vtigercrm/
     ServerName example.com
     ServerAlias www.example.com

     <Directory /var/www/html/vtigercrm/>
        Options +FollowSymlinks
        AllowOverride All
        Require all granted
     </Directory>

     ErrorLog ${APACHE_LOG_DIR}/error.log
     CustomLog ${APACHE_LOG_DIR}/access.log combined

</VirtualHost>
Save the file and exit.
Step 7: Enable the Vtiger and Rewrite Module
After configuring the VirtualHost above, enable it by running the commands below
sudo a2ensite vtigercrm.conf
sudo a2enmod rewrite
Step 8 : Restart Apache2
To load all the settings above, restart Apache2 by running the commands below.
sudo systemctl restart apache2.service
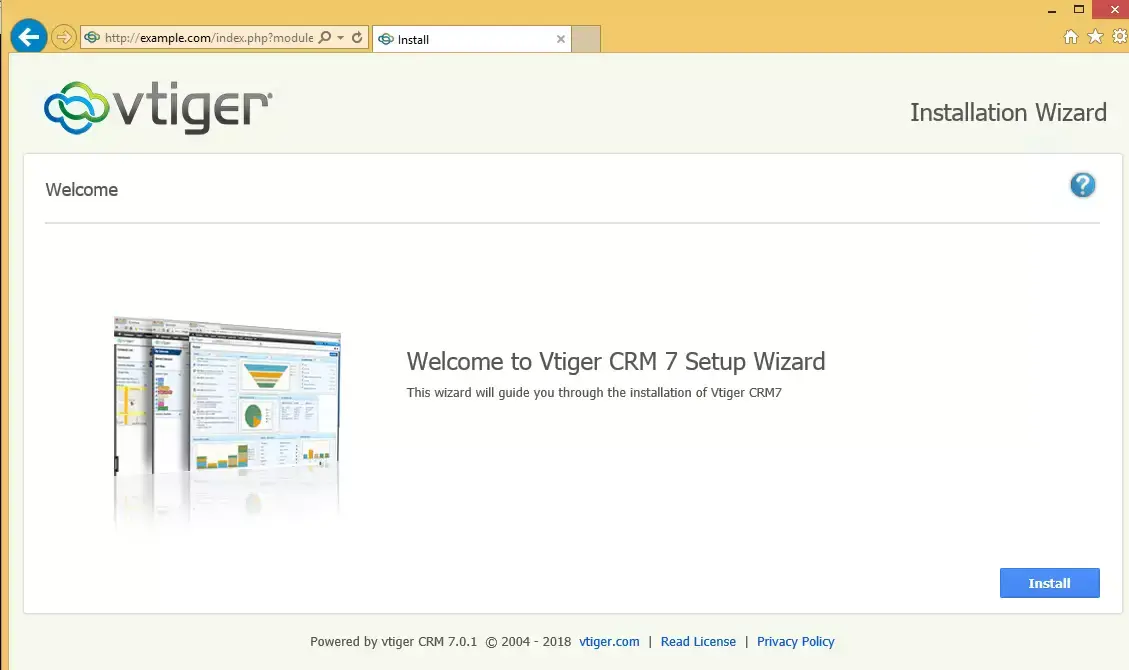
Then open your browser and browse to the server domain name followed by install. You should see Concrete5 setup wizard to complete. Please follow the wizard carefully.
Then follow the on-screen instructions until you’ve successfully installed Vtiger.
Type the database info and create an admin account for the portal.
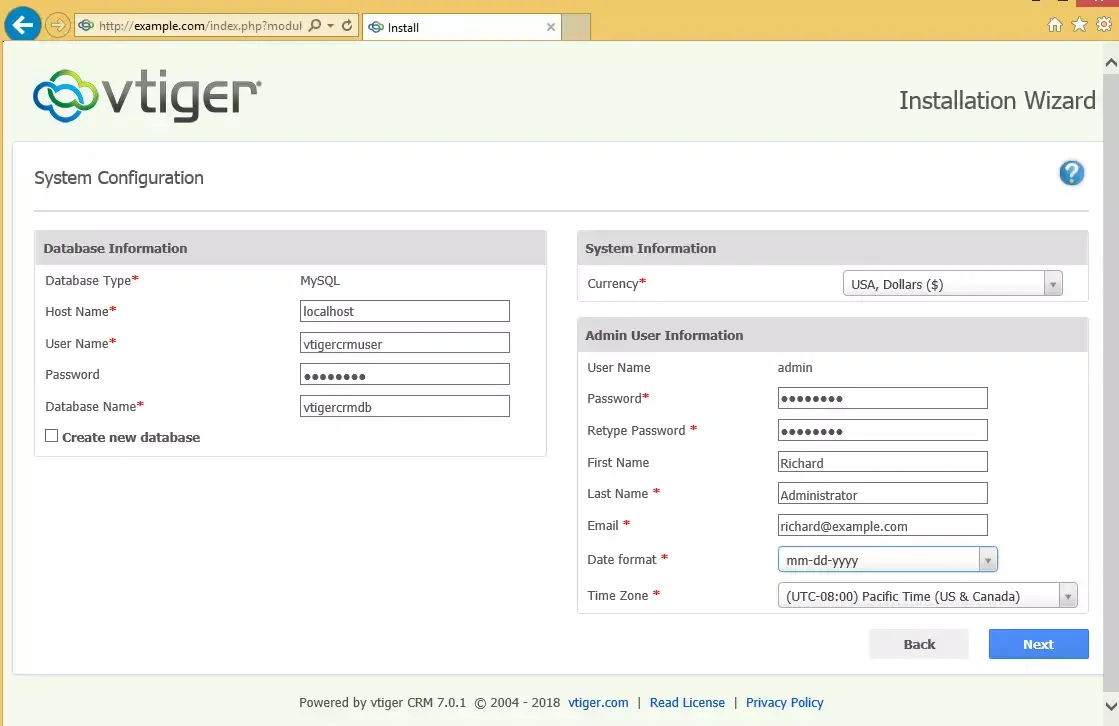
After a brief time, the installation should complete and the platform ready to be used.
Enjoy!
You may also like the post below:
imuz 컨버터11 윈도우 태블릿에 윈도우11 설치하기

사실 윈도우 태블릿의 강자라면 MS의 서피스가 답인데, 서피스는 아무리 사양이 낮은 제품도 가격이 그렇게 착하진 않다보니 저렴하게 사용할 윈도우 태블릿으로 imuz 컨버터11을 구입하게 되었다. 물론, 새것으로 구입하지 못하고 다른 사람으로 부터 얼마 사용하지 않은 제품을 저렴하게 양도 받았는데, 셀러론CPU에 4GB RAM 까지는 그런대로 괜찮은데 이 태블릿에 내장된 삼성 CJNB4R 64GB eMMC SSD의 성능이 아주 지랄인지라 체감속도에서는 좀 실망한 모델이긴 하다. 사실 필기를 주로 사용하려고 구입했는데 필기도 광고에서만큼 깔끔하게 써지지 않은 것은 물론이고 동봉되어 있던 도킹 키보드도 내구성이 좋지 않아 오타가 작렬하고 터치패드 마우스도 자기 멋대로 동작하는 등 불만이 많은 제품이긴 한데 도킹키보드는 아예 박스에 다시 싸서 집에 놔두고, 펜은 그냥 가볍게 쓰는 정도로 사용하고 있다.
최근 윈도우11이 나오면서 노트북에 설치해보니 UI와 UX가 나름 마음에 드는지라 태블릿에도 설치하고 싶어서 이 컨버터11에도 설치하려고 했는데 그냥은 설치가 안되는 것이, TPM 1.2로 인식하는데다가 64GB 스토리지지만 스토리지 뒤편에 10GB정도의 복구 파티션이 존재해서 부족한 용량으로 인식하여 업그레이드 설치가 되지 않는다.
이에 컨버터11에다가 윈도우11의 설치를 성공하여 이 블로그에 공개한다.
1. 윈도우11 설치에서 포기해야 할 것이 있다.
1) imuz 출고시에 만들어진 복구 파티션 (복구파티션에는 Win10 Home 20H2가 들어있다)
2) SSD 포맷
2. TPM 1.2 --> TPM 2.0으로 BIOS 변경
저렴한 태블릿이라 TPM 2.0이 되는가 했는데, BIOS 옵션에 있기는 있다.
도킹키보드를 연결한 상태에서 전원을 완전히 껐다가 켜면서 F1과 DEL을 번갈아 누르다 보면 CMOS 화면이 표시된다.
Advanced 메뉴에 Trusted Platform 메뉴에 들어가면 아래 그림과 같은 메뉴가 나오는데, 맨 아래 Device Select가
Auto로 세팅되어 있다. 이렇게 되면 TPM 1.2로 인식한다. 수동으로 TPM 2.0으로 고정 변경해 주고 BIOS 설정을
저장한다.
3. 윈도우11 설치
윈도우11 ISO를 다운로드 받고, USB에 굽는다. 그리고 CMOS 화면에서 바로 USB로 부팅하는 것이 좋다.
컨버터 11은 부팅 디바이스 선택 단축키가 없다.
TPM 2.0으로 변경했지만, CPU가 설치가 불가능한 CPU이다. 그리고 64GB SSD 라고 하지만 eMMC다 보니
사양체크에서 설치를 거부할 것이다.
윈도우11 부팅USB를 만들면서 아래 가이드에 있는 REG 파일을 넣어두고, 윈도우 설치를 시작하면서 우회 레지스트리
를 적용한다.
https://extrememanual.net/38862
윈도우11 TPM 없이 우회 설치하는 방법 - 익스트림 매뉴얼
이 PC에서는 Windows 11을 실행할 수 없음이 PC는 이 Windows 버전을 설치하기 위한 최소 시스템 요구 사항을 충족하지 않았습니다. 자세한 내용은 https://aka.ms/WindowsSysReq 방문하세요. 윈도우11을 설치할
extrememanual.net
설치하면서, 기존에 SSD에 있는 파티션을 모두 제거하고 설치한다.
파티션은 알아서 만들어 낸다.
그리고, 설치 시작.
설치가 잘 완료된다.
윈도우11 설치가 잘 완료되면, 드라이버는 반드시 설치해야 한다.
아래 imuz 자료실에 있는 통합 드라이버로 설치한다. 모든 드라이버가 잘 설치될 것이다.
https://shop.imuz.com/board/view.php?&bdId=data&sno=508
대한민국 브랜드, 아이뮤즈
가성비 노트북, 학생노트북, 직장인/사무용 노트북, 안드로이드 태블릿, 윈도우 태블릿, 전자출입명부 태블릿
shop.imuz.com
이게 실제 설치된 화면이다.
컨버터11 자체가 Win10 Home이 제공된 제품이다 보니 정품인증도 자동으로 되어 있다.
윈도우11을 컨버터11에서 사용하고자 한다면, 이와 같은 방법으로 도전해 보기를 바란다.
